Friday, July 6, 2012

Not a Tile Quilt

 Mystic Koi Pond

But it does have a tile quilt connection.

When our book, Tile Quilt Revival, was published in 2010, all the new quilts from the book were on exhibit at the Road to California quilt show in Ontario, California, thanks to our friend, Stevii.  (Thanks again, Stevii!)  Carol and I had a great time sitting in the middle of the exhibit talking to people and autographing books.  Our first Meet the Authors experience!  Here are some pictures of that exhibit.


But, back to Mystic Koi Pond, while there and shopping around a bit we spotted a gorgeous fabric with big beautiful Koi fish from Japan.  We were really drooling when the fabric was spread out on the cutting table.  It was a little pricey, but we finished off the bolt, which was only about a yard, and split it up between us.  So, that is the tile quilt connection!

This year at our annual quilt retreat in January, I decided that it was finally time to do something with the fish.  I was pretty nervous about it all but I designed an 8-inch block and took along a collection of batiks.  I was amazed when my plan actually seemed to work!  I did have some excellent guidance from the other participants in our sewing room (named "Fat Quarters") and I moved the blocks around so that the light ran across the quilt on the diagonal rather than in the center as I originally planned.  I liked the quilt so far.  If the fish didn't work, I'd still have a quilt I liked.  But, now to see if the fish would actually work on top of this pond I had made for them.  I was even more nervous when I cut out the first fish and placed it on the background.  Miraculously, it worked!  So, I cut out the rest of the fish and hand appliqued them in place, swimming around in their own mystic pond.  There were three single fish and two pairs.

 I didn't actually finish the applique until later and then I sent it to Shirley G. for her machine quilting expertise.  She quilted concentric circles all over the quilt, as if someone had just tossed a handful of pebbles (or fish food!) in the water.  And now I finally got the binding on and it is finished.  It's about 48'' square.

Here's a couple closeups.


 Carol's fish are still looking for a place to swim.  ( No pressure, my friend!)


Sunday, June 24, 2012

Mount Tam Quilt Guild

On Saturday, 6/16,  I was on top of a hill in San Rafael at the Mt. Tam Quilt Guild.  The views were lovely which can't be said for the 100 degree temperature!  But we persevered to have some fun and produce some great tile quilt blocks.

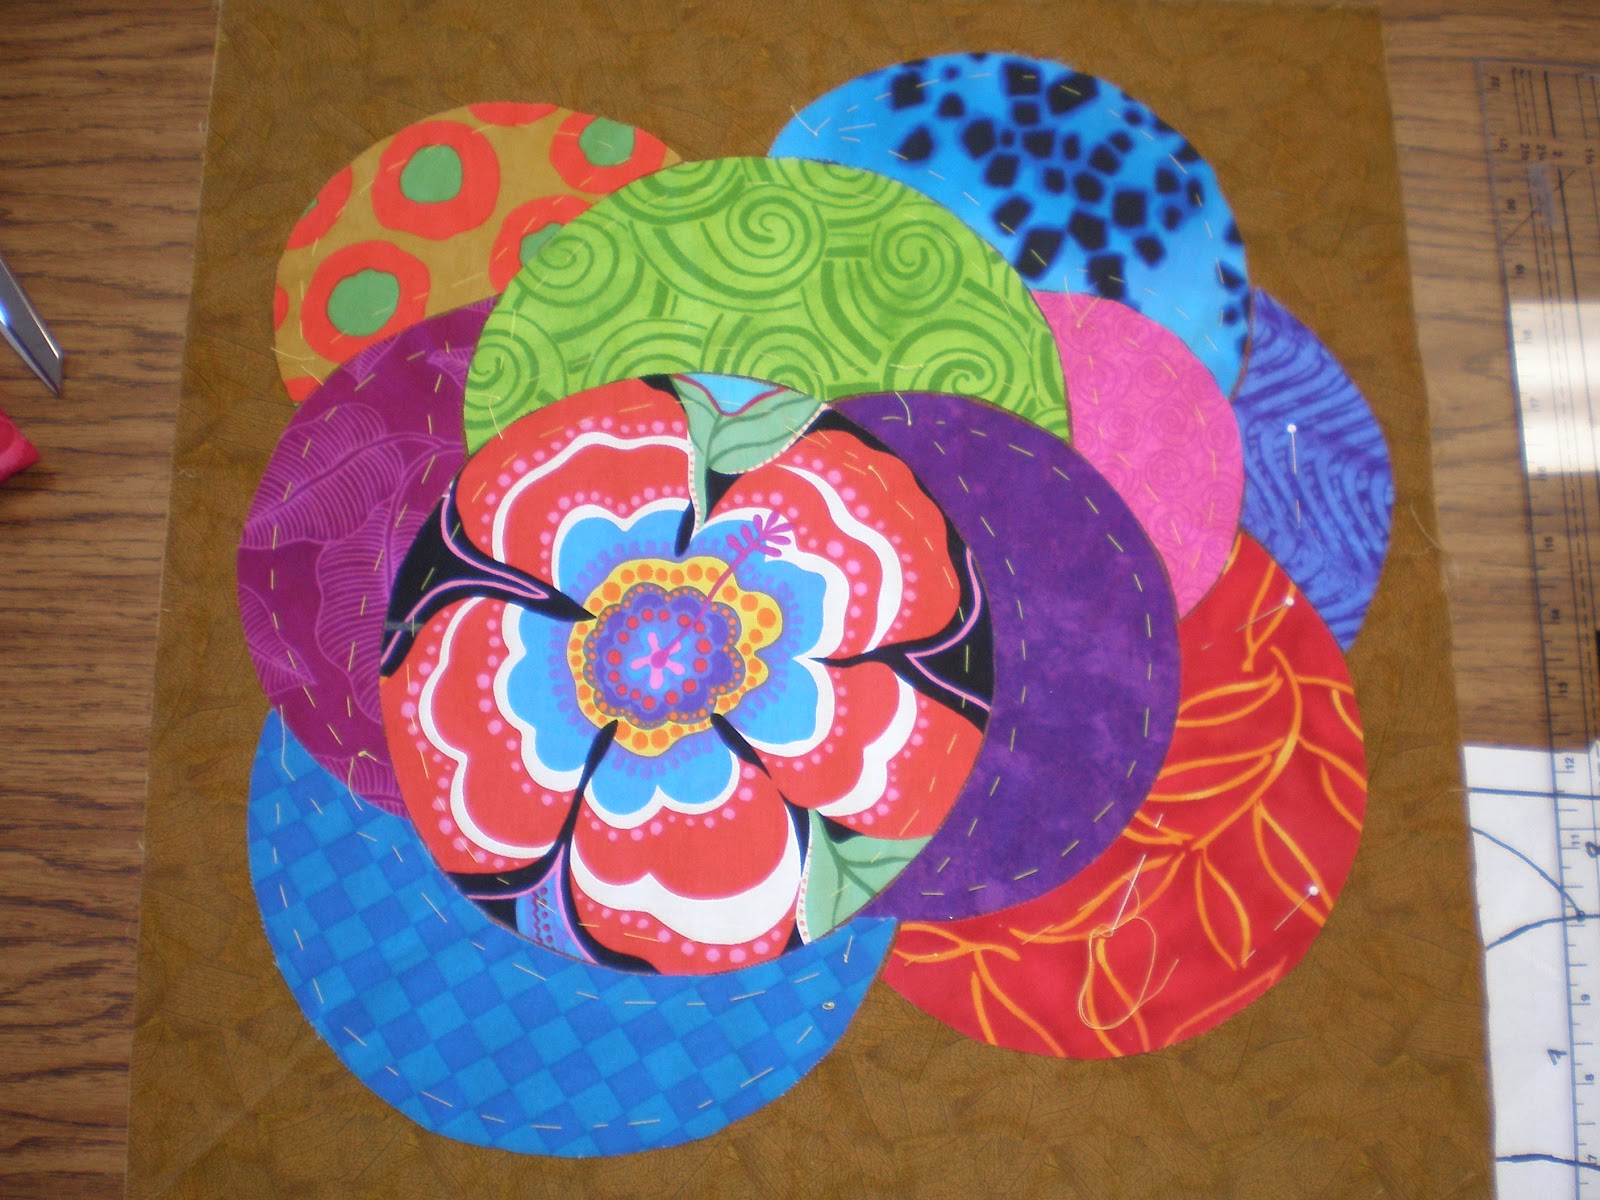
I didn't get photos for all the blocks for various reasons but here are a few.  The first two are fantastic Starry Orange Peel blocks.


 And here are some equally fantastic Lotus blocks.


The following two blocks, one Lotus and one Starry Orange Peel were made by two students who sat next to each other and just happened to bring the same focus fabric to work with.  Notice the big red and blue flower in each block.


 This student finished her block because she brought her machine and used machine applique technique rather than the needle-turn hand applique that I teach.  She, as did the student above, chose not to include the four corner pieces of the block which allows the circles to "float" on the background fabric. I love the Kaffe Fassett stripes.


And this student went to town and designed four blocks which will become place mats.  She used a different pattern from the Lotus quilt.  A table runner is in the plans also.


And this student designed her own block.  Between the center and the corner pieces, she plans to use the antique method of making tile quilts by appliqueing randomly-shaped pieces of fabric and leaving "grout" around each piece.  This is not the method that Carol and I use to make Tile Quilt blocks so it will be interesting to see how this works.  She was inspired by my lecture on antique Tile Quilts on Monday evening and the antique tile quilt that I showed.
 

There was another student who designed her own block after a watercolor painting she had done of Iris.  It was not far enough along to photograph but I'm sure will be fantastic when finished.  

 All in all a great day but some time in the afternoon when the heat was getting pretty oppressive (the church hall where we were was not air conditioned) and someone announced that they were leaving to go swimming, it must have sounded like a good idea as the class started to dwindle!


Thursday, May 24, 2012

Fun at Moonlight Quilters

Last week I was in Santa Rosa at the Moonlight Quilters of Sonoma County.

Before my lecture, I was so excited to see some antique tile quilt blocks.  Laura Bernstein is the lucky owner of this batch of blocks which also includes borders.  The blocks and borders are not finished blocks but all of the "tiles" have been selected and have been thread basted in place, waiting to be appliqued and turned into a quilt.  It was fascinating to see these blocks.  For the record, we have only been able to document about 25 actual antique tile quilts so to see these blocks was amazing.  Laura purchased the blocks from a dealer so unfortunately not much information is available as to their origin.  The fabrics in the "tiles" are obviously from the late 19th century which ties in to the timeframe for this style of quilt which is last third of the 19th century.

Laura was kind enough to allow me to take these quilts with me overnight so that I could photograph them.  I was staying with Judy Matheson and the next day we put them up on Judy's design wall.

 The blocks are mostly random shapes.  I didn't try to put them up in any sort of order, just to get an idea of what was there.  Some have a circle or square at the center.  And this isn't all of the blocks -- there are more.  I love the dabs of cheddar in the borders.

Here's a few of the blocks including a close up of the basting on the first one.


Judy, thanks for asking Laura to bring her blocks for me to see!

And then on Saturday came the Workshop with some of the Moonlight Quilters with all the wonderful fabric selections and designs.


This block is was drawn in class from the Macintosh Rose quilt in the gallery of Tile Quilt Revival.


 Great work everyone!

Thursday, May 3, 2012

Nite Owl Quilters

I had a great time in Rancho Cucamonga last week at the Nite Owl Quilters Guild.

 Before I gave my lecture on Tile Quilts, Jan Raymond came up to show me her fabulous version of the Lotus quilt from our book. Here is the quilt and a picture of Jan looking proud -- as she should!


And, at the workshop on Saturday, Kerri showed me a beautiful Crazy Quilt she made.  There is a theory that the original antique tile quilts from the late 19th century were a precursor of the Crazy Quilt style.  Kerri thinks this is the case.  I say could be, could not be.  We'll never really know but it's fun to think about.   Here is Kerri and her beautiful quilt.  She incorporated some antique ribbons, images of some antique cards she had transferred to cloth, her own hand-dyed fabrics and her fancy decorative stitching, which was amazing.

 
And in the workshop we had a wonderful array of fabrics and choice of blocks including an original design.  I always love to see stars!  Again, you have to imagine the "grout" between the pieces with the exception of the second block.


Here are blocks from Lotus.

This block was fused and will be machine buttonhole stitched around the edges of the pieces so you get to see how it looks with the "grout" spaces.


And, finally, some Orange Peel blocks from Starry Orange Peel.


Tuesday, April 17, 2012

New Tile Quilt

Jungle Beauty
I spotted this wonderful jungle print (Brazilia by Hoffman) when I was teaching my first Tile Quilt class at Quilter's Cupboard quilt shop in Atascadero, CA and I immediately thought, " tile quilt".  So a couple yards came home with me and I made up 4 Orange Peel blocks to use as class demos.  Awhile back I decided that I would really like to see these blocks finished up in a quilt so I made 4 new demo blocks in different fabrics and went about finishing up these blocks and turning them into a quilt.  

All of these blocks are Block G from our Starry Orange Peel quilt in our book.  I love the way that setting them together without the star blocks in between creates secondary patterns.  Now I always love star blocks but I'm wondering what would happen if 9 or 16 of these blocks were set together.

My blocks are 15'' finished with a 4-1/2'' border on each side.  I machine quilted in the "grout" and machine quilted around some of the flower and leaf motifs in the borders.  The applique, of course, is needle-turn by hand which I love to do.  The background fabric that creates the "grout" is two different polka dot fabrics.

If you are inspired to make a quilt with this idea, please send me pictures.  The pattern is in the book.
Here's a picture of Starry Orange Peel which was the first tile quilt Carol and I made.


And if you are driving Highway 101 through Atascadero, Quilter's Cupboard is well worth a stop.  www.quilterscupboard.com/

Wednesday, March 28, 2012

One more finished project!


 3 Cheers for the Red White & Blue


I just finished this project and I'm probably breaking rules by posting it here now but rules were made to be broken, right?  (I must be feeling feisty today.)  I belong to an applique group here in San Jose that I won't name and then I won't be breaking the rules so badly.  OK, it's the Applique Goddesses.  Every so often we have a challenge in which you receive a group of fat quarters.  I don't remember the rules too clearly since I'm so good at breaking rules, but you have to use a certain number of the fabrics in the packet and you can add a certain amount of fabrics.  The quilt also has to be exactly 30'' square.  I think I managed to follow that rule.  The quilts are supposed to be a secret until they are exhibited in May at Prairie Queens quilt shop in San Jose so that is the main rule I'm breaking here.

This time the fabrics were red, white and blue -- one of which had roosters on it but I chose not to include the roosters.  (I still recall walking through my Aunt Catharine's chicken coop as a child and getting my feet pecked!)  I used all the fabrics in the packet and I added the blue toile in the corners and the binding.

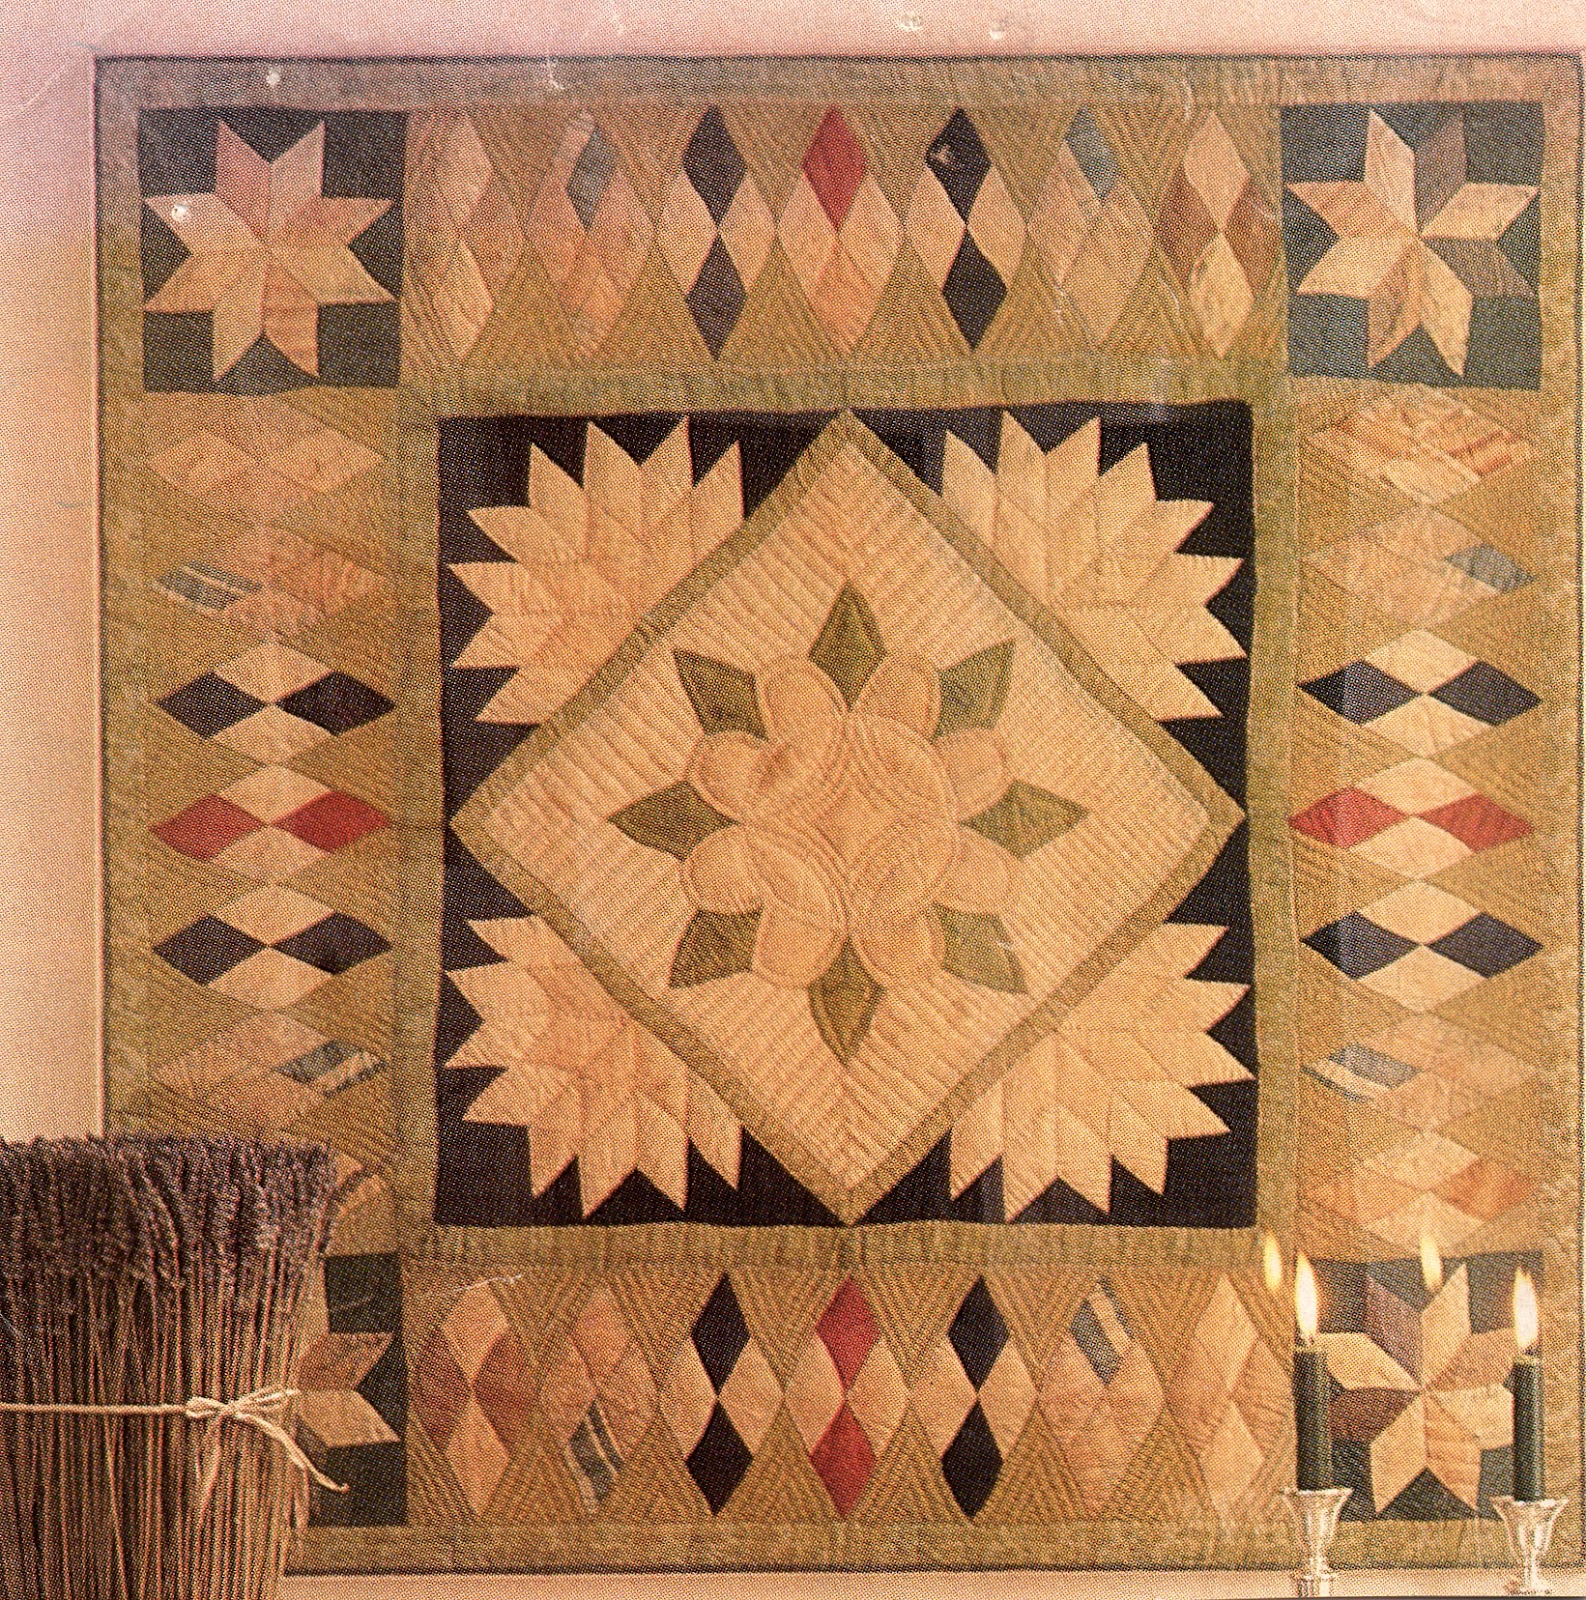
This quilt is based roughly on a pattern by Lisa DeBee Schiller published in McCall's Quilting magazine, October 2004.  I recognized Lisa's pattern as being based on an antique silk crib quilt called "Framed Medallion" published in Country Living's Country Quilts, Hearst Books, 1992.   Here is a picture of the Framed Medallion from the book.


I had admired this quilt for a long time and I'm happy that I've now finally been able to make my version of the quilt.  Due to the size restriction of the Challenge, I couldn't add the pieced diamond border of the original quilt or the appliqued border on Lisa's quilt.  And, I chose not to include the half stars in the corners of the medallion found in both the original and in Lisa's version.  For one brief moment, I thought about appliqueing the roosters in the corners but quickly regained my sanity and thought better of it!

If you're in the area in May, stop by Prairie Queens www.prairiequeensquilts.com/ to see the rest of the Red White and Blue challenge quilts.  I know there will be some great entries in this challenge.

Wednesday, February 29, 2012

Shirley G's amazing Tile Quilt

Co-author, Carol Gilham Jones, has already talked about the amazing tile quilt we recently saw at our annual quilt retreat on to her blog http://www.carolgilhamjones.blogspot.com/ but I wanted to "piggyback" on her blog to show the pictures I was able to get of Shirley's quilt top.


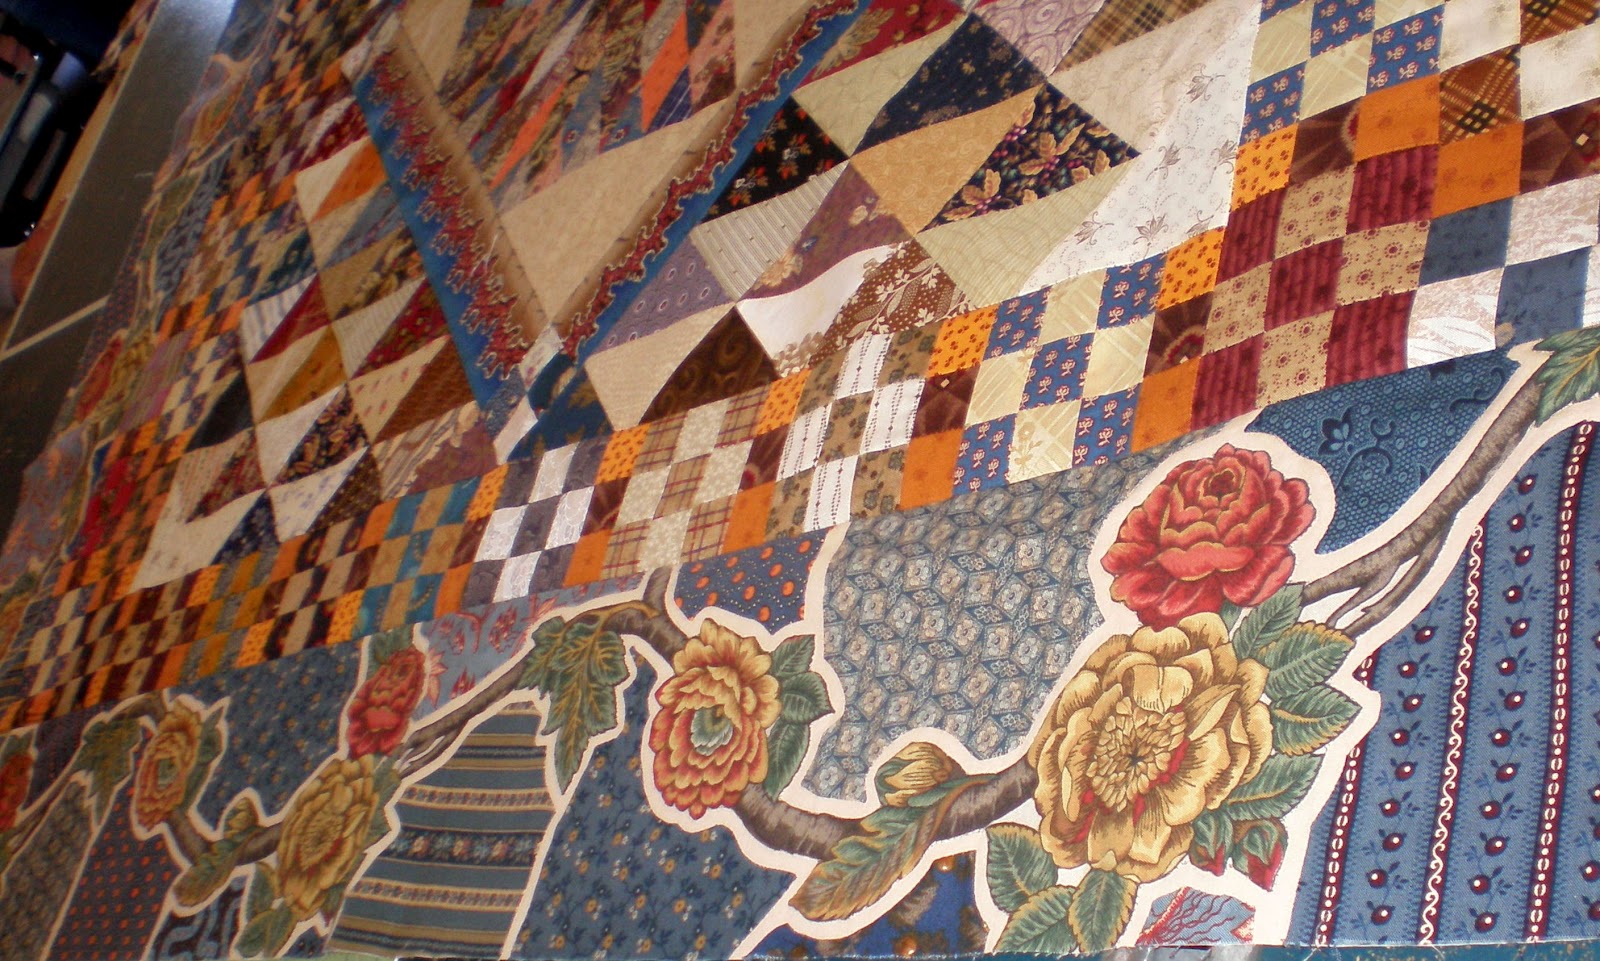
Here is a wonky view of the whole quilt top showing the wonderful pieced Tree of Life medallion center and the surrounding piecing. And here are individual views of the tile border.


Shirley has cut out the flowers, leaves and vine from one floral fabric and appliqued them to the background fabric as a wonderful feature in the border.  She then filled in the spaces with other fabrics in the typical random tile fashion.  As Carol pointed out on her blog, the change of color for the grout in the fan-shaped corners adds even more interest with the negative/positive play.

This is obviously a quilt in progress.  The picture of the full quilt top on the design wall on Carol's blog has another pieced border added.  We can't wait to see this quilt completed.   Especially when Shirley adds her wonderful machine quilting.  

Thanks, Shirley, for inspiring us and taking the tile quilt method to a new level.  I'm going to be on the lookout for a floral fabric that might lend itself to this design.